Feast your eyes on a culinary technique that’s as ancient as it is indispensable: roasting. It's more than just putting food in a hot oven; it's a transformative process, a beautiful alchemy that coaxes out the deepest flavors and textures. Truly, Understanding the Art of Roasting is about unlocking a realm of culinary possibilities, where simple ingredients achieve extraordinary heights.
If you’ve ever bitten into a piece of chicken with crackling, golden-brown skin and juicy, tender meat, or savored roasted vegetables bursting with caramelized sweetness, you've experienced the magic of a perfectly executed roast. This guide will walk you through the science, the methods, and the subtle nuances that elevate your cooking from good to unforgettable.
At a glance: Your Roasting Roadmap
- What it is: A dry-heat cooking method, typically in an oven, using high temperatures (often above 400°F/200°C) to brown food.
- The Magic: Creates a crispy, flavorful exterior (Maillard reaction & caramelization) while keeping the inside tender and moist.
- Why it's great: Enhances natural flavors, locks in juices, versatile for meats, vegetables, and even fruits, and often a healthier, hands-off option.
- Key to Success: Proper preparation (patting dry!), ample space in the pan, accurate temperature monitoring, and letting meats rest.
- Core Equipment: A sturdy roasting pan, a rack for air circulation, and a reliable meat thermometer.
- Pro Tip: Don't fear high heat; it's your friend for developing incredible crusts and flavors.
The Heart of the Matter: What Roasting Actually Is
At its core, roasting is a culinary technique that relies on dry heat, most commonly applied in an oven. Unlike baking, which typically uses moderate temperatures for delicate items like cakes and bread, roasting demands higher temperatures—generally between 350°F and 450°F (175°C to 230°C), often pushing above 400°F (200°C). This intense heat is the catalyst for a remarkable transformation.
Imagine a piece of raw food entering this fiery environment. As the dry heat envelops it, two crucial chemical reactions begin to unfold on the surface:
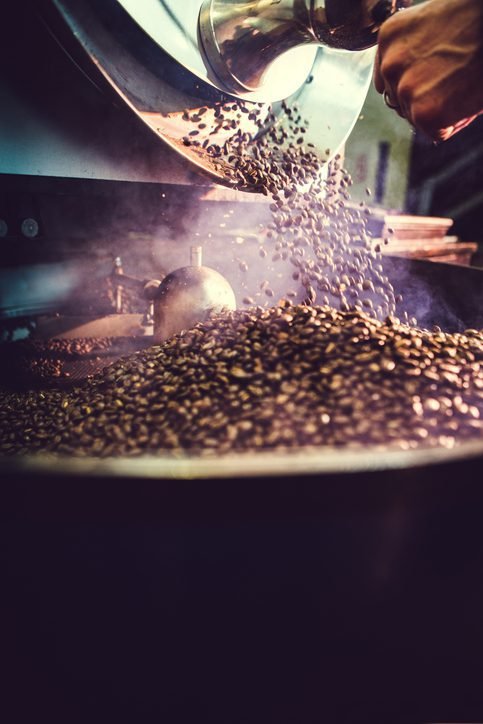
- The Maillard Reaction: This isn't just "browning"; it's a complex interaction between amino acids and reducing sugars. It's responsible for the incredibly savory, complex, and distinctive flavors you associate with roasted meats, bread crusts, and even coffee. Think of the rich aroma and deep taste notes – that's Maillard at work, building layers of flavor that simply don't exist in steamed or boiled foods.
- Caramelization: This reaction specifically involves the breakdown of sugars under high heat, resulting in nutty, sweet, and slightly bitter notes, alongside that characteristic golden-brown color. While Maillard focuses on proteins and sugars, caramelization focuses purely on sugars, transforming them into something far more complex and appealing.
Together, these reactions forge a delectable, browned crust on the exterior of your food, while the internal moisture is largely retained, resulting in a succulent and tender interior. This perfect balance of textures and flavors is what defines a truly great roast.
The Unrivaled Benefits and Incredible Versatility of Roasting
Why choose roasting over other cooking methods? The answer lies in its unique advantages and adaptability.
Roasting is a master at flavor development. The intense dry heat not only creates a magnificent crust but also concentrates and deepens the natural flavors of your ingredients. Sugars within the food caramelize, adding a wonderful sweetness and complexity, while the Maillard reaction builds rich, layered tastes that are simply unparalleled. This process literally locks in the natural juices, ensuring that whatever you’re roasting emerges moist and tender on the inside, beautifully contrasted by its flavorful, crispy exterior.
Beyond flavor, roasting is remarkably versatile. It's the go-to method for a vast array of ingredients:
- Meats: From a succulent whole chicken or turkey to a tender beef roast, pork loin, or even a rack of lamb, roasting consistently delivers show-stopping results.
- Vegetables: Root vegetables like potatoes, carrots, parsnips, and sweet potatoes transform into sweet, tender bites. Cruciferous vegetables such as Brussels sprouts, broccoli, and cauliflower become wonderfully nutty and less bitter. Even delicate items like asparagus and bell peppers shine when roasted.
- Fruits: Don't overlook roasted fruits! Apples, pears, and even stone fruits like peaches and plums develop incredible depth and sweetness, perfect for desserts or savory pairings.
Furthermore, roasting can often be a healthier cooking option. It typically requires less added fat than frying, relying instead on the food's natural fats and a minimal amount of oil to facilitate browning. It's also incredibly efficient: with minimal prep, much of the cooking time is hands-off, freeing you to focus on other aspects of your meal.
Mastering the Roasting Process: Your Step-by-Step Guide
While roasting can seem intimidating to the uninitiated, it’s a straightforward process once you understand the core principles. Think of it as a dance between heat, time, and careful preparation.
1. The Critical Preheat: Don't Rush It!
This is non-negotiable. Always preheat your oven to the recommended temperature for at least 15 to 20 minutes before you put any food in. Why so long? Ovens cycle on and off to maintain temperature, and often the preheat "ding" signals only that the air around the thermometer probe has reached temperature, not that the oven walls and racks are fully saturated with heat. A properly preheated oven ensures consistent, radiant heat from the moment your food enters, promoting immediate searing and even cooking.
2. Prepare Your Ingredients with Precision
- Vegetables: Wash, peel, and chop your vegetables into pieces of roughly similar size. This ensures they all cook at the same rate, preventing some from burning while others remain raw. Toss them with 1-2 tablespoons of olive oil, salt, and pepper.
- Meats: Pat your meats dry with paper towels before seasoning. Moisture on the surface inhibits browning, leading to a steamy, grey exterior instead of a beautiful, crispy crust. For an even crisper skin on poultry, consider letting it sit uncovered in the refrigerator for a few hours (or even overnight) to further dry the skin. Season generously with salt, pepper, and your chosen herbs and spices.
- Marinating: For deeper flavor and tenderness, marinate meats for a few hours or overnight. Just remember to pat dry before roasting if the marinade contains significant moisture.
3. Arrange for Success: Space is Your Friend
This is another crucial step often overlooked. Place your ingredients in a single layer in the roasting pan. Crucially, leave ample space between pieces. If you overcrowd the pan, the moisture released by the food will turn into steam, effectively steaming your food rather than roasting it. This is the enemy of crispy exteriors and deep browning. Use multiple pans if necessary. For meats, ensure it’s not touching the sides too much.
4. Monitor with a Mission: Don't Guess, Measure
Resist the urge to open the oven door frequently! Each time you do, the internal temperature can drop by 25-50°F (15-30°C), significantly extending cooking time and potentially impacting the final texture.
- Meat Thermometer: For meats, a reliable meat thermometer is your best friend. Insert it into the thickest part of the meat, avoiding bone or large pockets of fat, which can give inaccurate readings. An instant-read digital thermometer is excellent for quick checks, or an oven-safe probe thermometer can stay in throughout the cook, alerting you when the target temperature is reached.
- Rotation: If you're using a conventional oven (without a convection fan), rotating the pan halfway through the cooking time helps ensure more even browning, as hot spots can occur.
5. The Golden Rule: Rest Your Meats
Once your roasted meat reaches its target internal temperature, remove it from the oven and transfer it to a cutting board. Tent it loosely with aluminum foil and let it rest for at least 10-15 minutes (longer for larger cuts) before carving. This rest period allows the muscle fibers to relax and reabsorb the juices that have been pushed to the center during cooking. Carve too soon, and those precious juices will spill out, leaving you with dry meat.
The Science of Heat: Temperature and Doneness Guidelines
The right temperature is paramount for perfect roasting. It’s a balance between developing that beautiful crust and cooking the interior to the desired doneness without drying it out.
Roasting Meats: Specific Targets
Meats, especially large cuts, often benefit from a two-stage roasting process: an initial high-temperature sear to develop a crust, followed by a lower temperature to cook gently and evenly.
- Beef:
- Medium-Rare: Target internal temperature 135°F (57°C) when removed from oven (will rise to 140-145°F / 60-63°C after resting).
- Medium: Target internal temperature 150°F (66°C) when removed from oven (will rise to 155-160°F / 68-71°C after resting).
- Example: A prime rib roast (3-4 lbs) might start at 450°F (230°C) for 20 minutes to sear, then be reduced to 325°F (160°C) for about 1.5 hours until it reaches your desired doneness.
- Chicken:
- Internal Doneness: 165°F (74°C) in the thickest part of the thigh, avoiding bone.
- Example: A whole chicken (4-5 lbs) can roast at 375°F (190°C) for approximately 1 hour 20 minutes (roughly 20 minutes per pound). For super crispy skin and even cooking, try starting at 425°F (220°C) for the first 15 minutes, then reducing the temperature to 375°F (190°C) for the remainder of the cooking time.
- Pork Loin:
- Internal Doneness: 145°F (63°C) when removed from oven (will rise to 150°F / 66°C after resting).
- Example: Roast at 375°F (190°C) for about 25 minutes per pound.
Roasting Vegetables: Seeking Tenderness and Sweetness
Vegetables generally thrive at higher temperatures, which encourage caramelization and tenderization.
- General Range: Most vegetables do beautifully at 400°F-425°F (200°C-220°C).
- Carrots: Roast at 425°F (220°C) for 20-25 minutes, or until tender-crisp and lightly browned.
- Potatoes: Roast at 425°F (220°C) for 30-40 minutes. They're done when fork-tender and slightly crispy, often reaching an internal temperature of around 205°F (96°C) for a fluffy interior.
- Actionable Temperature Insights: For most meats, especially larger cuts, starting with a high temperature (like 450°F / 230°C) helps create a beautiful sear and crust. Then, reducing the temperature (to around 325°F / 160°C) allows for more gentle, even cooking, which is crucial for moisture retention in the interior. Smaller items or delicate meats might benefit from a consistent medium-high temperature throughout.
Unpacking Roasting Techniques: Beyond the Oven Door
While oven roasting is undoubtedly the most common and accessible method, the art of roasting encompasses several distinct techniques, each with its own advantages.
1. Oven Roasting: The Home Cook's Staple
This is the method we’ve largely discussed: food placed in a preheated oven, relying on dry, circulating heat to cook and brown. It offers the most control over temperature and is perfect for everything from whole chickens and beef roasts to sheet pans of vegetables. Temperatures typically range from 350°F to 425°F (177°C–218°C), striking a balance between developing tenderness and achieving that desired browning. It's the go-to for reliability and ease.
2. Spit Roasting: The Rotisserie Revolution
Picture a whole hog slowly turning over an open flame at a grand feast – that's spit roasting. This technique involves rotating meat on a spit over a heat source (often an open fire, but also available in some ovens). The continuous rotation ensures incredibly even cooking and natural self-basting, as juices and fats drip and redistribute around the meat. Ideal for large, awkwardly shaped cuts like whole chickens, turkeys, lambs, or prime ribs, it imparts a wonderful smoky flavor and an exceptionally crispy skin. A common temperature guideline for spit roasting is around 325°F (163°C), allowing 20–30 minutes per pound. It’s a method that truly celebrates the spectacle of cooking.
3. Pan Roasting: The Best of Both Worlds
For those craving an exquisite crust and a tender interior on individual cuts of meat, pan roasting is a brilliant hybrid technique. It begins on the stovetop, where meat (like a thick-cut steak, pork chop, or chicken breast) is seared in a hot, oven-safe skillet (often cast iron) for 2–3 minutes per side. This initial sear creates a rich, caramelized crust. Immediately after searing, the entire pan is transferred to a preheated oven, typically around 400°F (204°C), to finish cooking through for another 6–10 minutes, depending on thickness and desired doneness. This method is superb for locking in juices and developing deep flavor quickly. As a bonus, the fond (browned bits) left in the pan can be deglazed with wine or stock to create an instant, flavorful pan sauce.
Equipping Your Roasting Arsenal: Essential Tools
Having the right tools can make all the difference between a good roast and a truly spectacular one. These are the workhorses of the roasting kitchen:
- Roasting Pan: Invest in a sturdy, heavy-duty roasting pan. Stainless steel or cast iron are excellent choices because they conduct and retain heat evenly, promoting consistent browning. Look for one with high sides to contain juices (perfect for making gravy later!) and a large surface area to prevent overcrowding. Avoid glass or ceramic pans for meats, as they can heat unevenly and crack under high temperatures or sudden changes.
- Roasting Rack: This is a game-changer. A rack elevates your food above the bottom of the pan, allowing hot air to circulate completely around it. This is critical for preventing the bottom of your roast from steaming and ensures an even, crispy crust all over. V-shaped racks are excellent for stabilizing large, round cuts like turkeys or prime ribs, while flat racks work well for vegetables or smaller meat cuts. No rack? No problem! A sturdy bed of chopped aromatic vegetables (like carrots, celery, and onions) can serve a similar purpose, infusing your roast with flavor in the process.
- Meat Thermometer: We can't stress this enough: a reliable meat thermometer is indispensable for food safety and achieving perfect doneness. Digital instant-read thermometers provide quick, accurate readings, while oven-safe probe thermometers allow you to monitor internal temperature without opening the oven door. This single tool removes all the guesswork from roasting.
- Your Oven: While most home cooks use a conventional oven, it's worth understanding its nuances.
- Convection Ovens: These ovens have fans that circulate hot air, resulting in faster and more even cooking, often leading to crispier exteriors. If you have one, you might need to reduce cooking temperatures by about 25°F (15°C) or shorten cooking times.
- Conventional Ovens: These rely on radiant heat. As mentioned, rotating your pan halfway through the cook helps mitigate potential hot spots and promotes even browning.
- Broiler: Don't forget your broiler! A quick blast under the broiler for 2-3 minutes at the end of roasting (watched very, very closely!) can add an extra layer of crispness to chicken skin or a beautiful char to vegetables.
- Other Handy Tools:
- Sharp Knives and a Sturdy Cutting Board: Essential for preparing your ingredients and carving your finished roast.
- Aluminum Foil: Useful for tenting roasted meats during their rest period to keep them warm and allow juices to redistribute. It can also be used to loosely cover parts of a roast that are browning too quickly.
Overcoming Roasting Roadblocks & Elevating Flavors
Even experienced cooks encounter challenges. Knowing how to troubleshoot and consciously enhance flavors will turn you into a true roasting virtuoso.
Addressing Common Roasting Pitfalls
- Overcooked or Undercooked Food: The most common issue! This is where your meat thermometer truly shines. Use it consistently. Remember to account for "carryover cooking," where the internal temperature of a large cut of meat will continue to rise by 5-10°F (3-6°C) after it's removed from the oven. If your food is still undercooked, simply return it to the oven, keeping a closer eye on it.
- Dry or Lackluster Meat: Patting meat dry before seasoning is paramount for achieving a good sear, which in turn helps seal in juices. Also, resist the urge to carve meat immediately after roasting; the resting period is critical for juicy results.
- Uneven Browning: This usually comes down to overcrowding the pan, which leads to steaming, or inconsistent heat distribution in your oven. Ensure ingredients are cut to similar sizes and give them space. Rotate your pan in a conventional oven as needed.
Unlocking Deeper Moisture and Flavor
Roasting is an art of enhancement. Don't be shy about building flavor from the ground up:
- Marination: For meats, a flavorful marinade (herbs, spices, acid, oil) can tenderize and infuse flavor deep into the muscle fibers.
- Basting: While modern culinary science suggests basting may not prevent drying, it certainly adds flavor to the surface and can help develop a richer crust. Baste with cooking juices, wine, or stock.
- Generous Seasoning: Don't underestimate the power of salt and pepper, but also explore a wide range of herbs and spices. Thyme, rosemary, oregano, sage, and garlic are classic companions for roasted meats and vegetables. Lemon or orange zest adds bright, fresh notes.
- Aromatics in the Pan: Placing onions, carrots, celery, and garlic under your roasting rack or around your meat not only adds flavor to your drippings (perfect for gravy!) but also helps elevate the food for better air circulation.
- Strategic Herb Addition: Delicate herbs, like fresh parsley or chives, are best added towards the end of roasting or after the food comes out to prevent them from burning. Hardier herbs like rosemary and thyme can go in from the start. A simple trick for adding moisture to your roast can be found in our comprehensive guide on generating your own roasts. This can help you experiment with different flavor profiles and ensure succulent results every time.
Beyond the Basics: Elevating Your Roasting Game
Once you've mastered the fundamentals, you can begin to experiment and refine your roasting techniques further.
- Compound Butters: For an extra layer of flavor and crispness, especially on poultry, rub a mixture of softened butter, herbs, garlic, and zest under the skin before roasting.
- Brining: For incredibly juicy poultry or pork, consider a wet or dry brine. This process helps the meat retain moisture and enhances seasoning throughout.
- Sheet Pan Meals: Embrace the efficiency of a one-pan roast! Combine protein and vegetables on a single sheet pan for a delicious and easy weeknight meal. Just ensure vegetables are cut smaller than dense proteins to ensure they cook in sync.
- Deglazing for Sauce: Never let those browned bits at the bottom of the pan go to waste! After removing your roast, place the pan over medium heat on the stovetop, add a splash of wine, stock, or even water, and scrape up all those flavorful bits. This forms the base of an incredible pan sauce or gravy.
Your Journey to Roasting Mastery
Roasting is more than a technique; it’s a commitment to flavor, a celebration of transformation, and an incredibly rewarding skill to hone. From the simple act of preheating your oven to the satisfying moment you carve a perfectly rested roast, each step is an opportunity to create something truly delicious.
By embracing the principles outlined here—the importance of high heat, the magic of the Maillard reaction, the necessity of a meat thermometer, and the power of proper preparation—you're well on your way to perfecting this culinary art. So go forth, preheat that oven, and unleash the incredible flavors and textures that only a well-executed roast can deliver. Your taste buds (and your dinner guests) will thank you.